
Low Cost Wall Pocket for Craft Supplies
Last Updated on August 2, 2017 by lydiaf1963
So…the stash. If you are a creative person you have one. The bulk of mine is composed of yarn, but there’s a good bit of paper, too. Oh, and some cardboard I thought might come in handy. Plus some fabric leftover from a set of kitzy IKEA curtains. I think I might have a problem! Maybe my problem (the stash that is might be getting out of control) can help me solve a different challenge. I have a cutting mat, some rulers and a few other odd sized tools that need to be stowed. Let me tell you how I made my wall pocket. Maybe you can adapt some items you have on hand to make your own.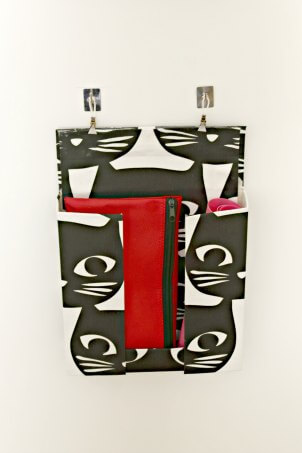
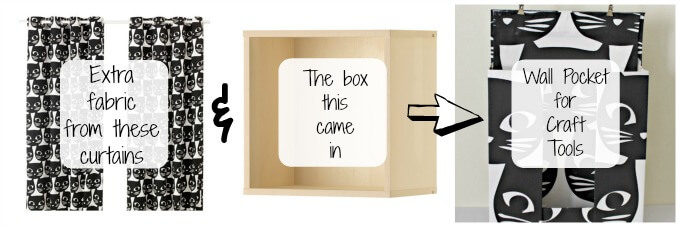
We had to buy furniture when we moved into our new apartment. While we were browsing through IKEA I came across a set of Mattram curtains I thought were really cute. Then, when I was away on my Camino trip, Rick bought the curtains as a surprise and had them tailored to fit the space. This is common in Spain. You buy curtains by the width and have a seamstress alter them. Anyway, there was a fair chunk of fabric leftover and I kept it thinking I could find a use for it.
In addition to the curtains, we also bought a table and a desk and several Forhoja wall cubes (these don’t seem to be listed on the US site, sorry). Long story short, I ended up with lots of cardboard boxes, some nice whole sheets of cardboard without folds plus a bunch of spacers made of laminated cardboard that resemble blocks. It was by happy coincidence that I figured out my cutting mat fit into the boxes our wall cubes were packed into.
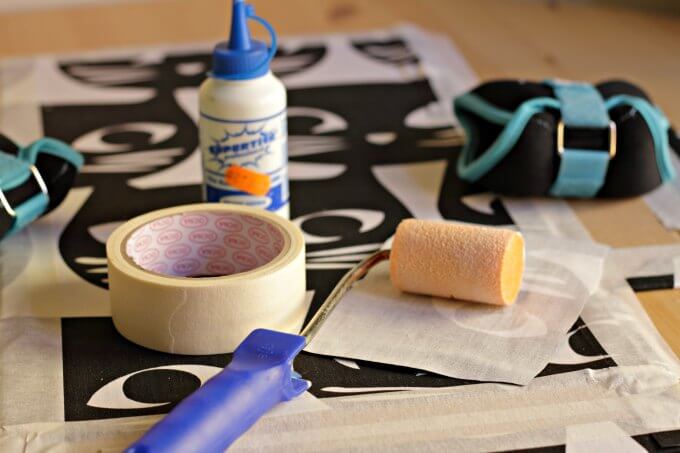
To make the wall pockets I used:
- fabric (iron it if necessary)
- cardboard box
- clips for hanging
- white glue
- masking tape
- spray adhesive
- small foam roller
- cutting mat
- rotary cutter
- scissors
- glue gun
- glue sticks
- clamps
- iron
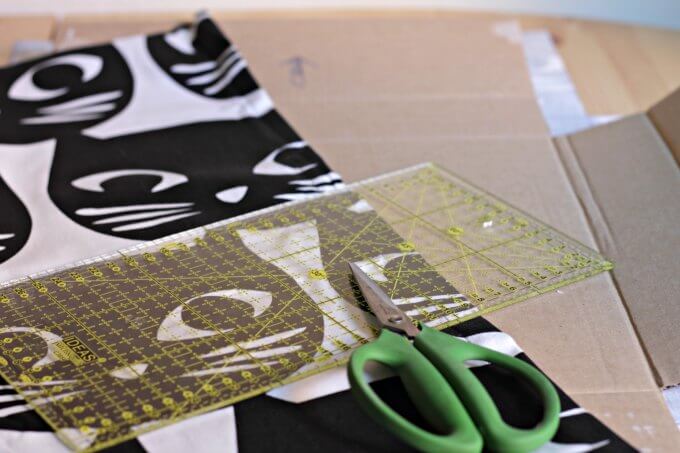
Open the box and lay it out flat on the fabric. I marked my box to indicate UP since my fabric has a directional pattern. Using a ruler, draw around the box then draw a second line to give an inch margin. Cut this piece out using scissors or a rotary cutter. This piece will cover the outside of the box. For the inside cut a rectangle the length and width of the center section of the box, adding a 1/4″ margin. Cut this piece out and turn the raw edge under. You may need an iron to press the edges down.
You should have two pieces of fabric, an outside and an inside, and a cardboard box.
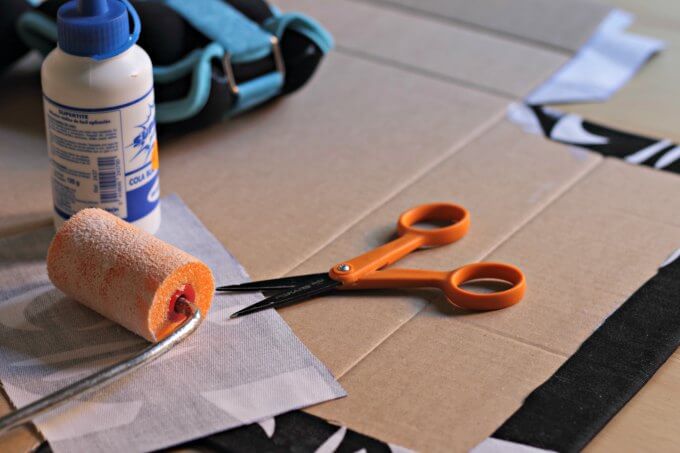
Lay the outside piece of the fabric face down on your work surface. Apply the spray adhesive to the outside of the box then set it in place on top of the fabric, making sure to match up the lines and the orientation. Apply a bead of white glue to the edge of the box and the fabric margin, clipping the fabric so it folds over neatly. Use the roller (or a brush, or your finger) to spread the glue into an even layer. Fold the margins onto the inside of the box and smooth down. Masking tape is helpful in holding the fabric in place while the glue dries.
You could use a glue gun for this step, but the sticks are kind of expensive where I live, and white glue is pretty cheap, although it often needs a masking tape assist…
Cover the inside of the box by spraying the cardboard with the spray adhesive and arrange the fabric evenly over top. Again apply a bead of glue around each side and glue the edges of inside piece down. Again, tape is helpful in keeping the fabric in place while the glue dries. I also used a pair of hand weights to help keep the cardboard flat.
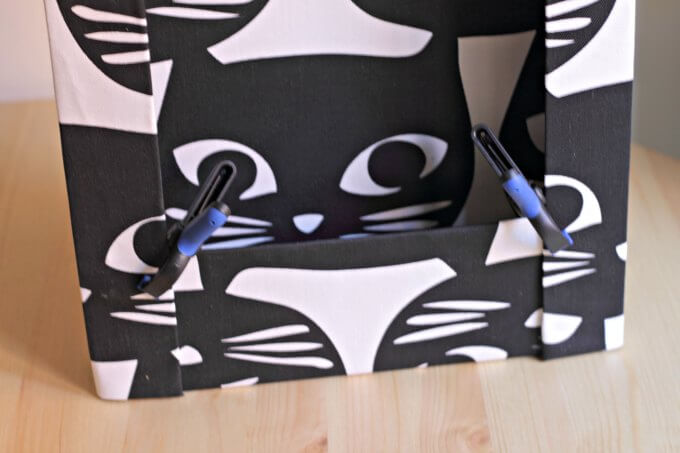
When everything is dry, carefully remove the tape and use the glue gun (or any fast drying, strong glue) to assemble the box. Decide whether you like the sides on top or the bottom before fastening, but be sure to leave the top open for hanging. Attach the clips to the top and hang. Mine are on the back of the door to my craft room.


The wall pockets are sturdy enough to hold my cutting mat and rulers in one and my glue gun, sticks and silicon mat in the other. I tried to add more, but the clips fail. Maybe you’ll be able to come up with a better way to hang your wall pockets.
This post is part of the Craft Room DeStash Challenge hosted by Cmon Get Crafty. The rules were as follows: 1) You’re only allowed to use items from your stash 2) You may spend $10 to buy supplies. I had everything I needed in house, but I still have some fabric left. Look for more destashing projects in upcoming blogs!
Use the link up below to see how other crafty bloggers dealt with their stash!

What a clever idea!
Thanks, Deborah! So far it’s working great. And no loss if I decide I want a change later on.
Cute idea! Can never get enough storage. Visiting from Crafty Destash.
That’s true! Thanks for dropping by 🙂
Very clever use of fabric remnants. I too don’t like to get rid of things as I know I will some day find a use for them…esp fabric.
I have enough fabric left for another project. We’ll have to wait and see what it will be… 🙂
What a great idea. You used up some of your crafting supplies and got organized. It is a pretty way to get organized as well.
Thanks! I’m pretty happy with how it turned out.
Wow. Those cat curtains are SO cute, and I love that you reused the extra for your wall pocket. So clever.
Thank you, Sue! It was an enjoyable project that solved a problem.
Clever! I’m working on organizing my craft room. The only problem is, I start to organize and the next thing I know, I’m working on a project! #CraftyDestash
Been there, done that! 🙂
What a neat idea Lydia. I love that cat fabric! Your post is making me want to take a trip to IKEA.
Enjoy the meatballs 🙂
Great idea! I love repurposing things because it’s fun and eco-friendly.
It’s fun to experiment, isn’t it?
What a great way to get organized!
It was fun! Now I need something for my desk top…
What a great idea for using something that would normally end up in the trash!
Thanks, Pam 🙂
Hmm, wall pocket is a new term for me! Love anything that helps organize though, especially if it is pretty like this!
They’re definitely a thing. My favorites are the ceramic or porcelain ones meant to hold a few flowers or other pretties. Thanks for sponsoring the challenge 🙂